Sunday, August 31, 2008

Pâte à choux - Finally :)

Éclairs certainly did meet my high expectations leading up to my first daring bakers challenge. I probably never would have attempted the recipe on my own, which is exactly the impetus I was hoping for when joining on. Generally éclairs do not take top billing on the list of desserts I would choose to eat. After completing the challenge, however, I can revise that to include only store-bought éclairs, because the home-made version was surprisingly fresh and ever so much tastier. For some time now, I’ve wanted to attempt pâte à choux to make a cream puff creation of some sort, but just never quite got around to it until now.

Olivia (5)

The challenge exposed major deficits in my kitchen equipment, though: I had to keep washing and coordinating the reuse the same heavy pot because I only have one suitable to the various tasks required of it. (Hopefully my fiancé will now understand why I’ve registered for several new pots and pans.) The challenge also revealed a bit of my baking personality: an appreciation/reliance on well-organized and aptly descriptive recipes.

Olivia (1) Olivia (2)

The recipe took several readings before and flipping back-and-forth during to appropriately cobble together all necessary components. A few things I just winged, which turned out to affect the end result. For instance, I was unsure of the exact dimension of piping the choux. Yes, 4 inches long but how thick? “Chubby fingers” was a relative term that left me guessing and so I varied the thickness, which altered the cooking time, which I probably underdid. While beautifully golden, puffed, and hard upon removal from the oven, my buns deflated with cooling. I suspect I undercooked them or perhaps had moisture issues during the cooling process.

Olivia

The original Hermé recipe, with two elements of dark chocolate, was a bit decadent for my palate so I chose to alter the ingredients of the pastry cream. But I did not venture too far. Hoping for something more traditional in appearance, I substituted white chocolate for the semisweet. The result was excellent! I used Green and Blacks organic white chocolate, which lended a delicate vanilla flavor and a multitude of vanilla bean flecks to the pastry cream.

Olivia (3)

I would have liked a more professional appearance by piping/injecting the pastry cream directly inside the pastry shell in lieu of splitting into messy, uncontained sandwiched layers, but I was unsure of when it would be acceptable to pipe. Does the pastry shell have to cool or do you do it while it’s still hot? If you do it while it’s hot what does this do to the texture of the pastry cream? Being pressed for time I did not experiment or consult pertinent resources. Also, I had a bit of trouble controlling the application of the chocolate glaze. Should I have left the chocolate glaze to cool a bit to let it firm up? I applied it after removing directly from heat. The result was a bit runny for my preference, but thickened nicely once refrigerated. I know this because I am enjoying daily spoonfuls from the bountiful leftovers. While I was not completely satisfied with the presentation of the final product, the pastries certainly were delicious and a huge hit at my housewarming brunch.

Olivia (4)

- Olivia

Saturday, August 9, 2008

My Dad's 56th Birthday Cake!

Well as my first daring bakers challenge I was really excited to make this recipe, it was certainly not anything I would ever decide to make on my own but sounded like an ideal celebration cake for my dad's 56th birthday which was at the start of August. I ran into many many challenges along the way but somehow ended up relatively happy with the results.

fullcake

The hazelnuts would not skin, after trying to "toast and rub" which took most of a night for the genoise, I opted for the "boil and wash" method for the prailine which worked much better but did leave the nuts soggier, which was fine for the praline but good to note for the future. I also used a double foil pan for baking for stability which lead to a underbaked middle which, upon cutting into (2, not 3) layers, had to rebake and therefore slightly dry out the cake itself. The praline buttercream was increidble and definitely made the cake...the 3 sticks of butter also broke my hand beater, and therefore everything post-beating the butter was done by hand; it was fun to get down on the floor and really work the ingredients by hand, especially the whipped cream.

piece

Overall the cake was a big hit, it looked beautiful and tasted good if not a little dry. I would love the chance to make this again and can't wait for the next challenge!

-Alison

Wednesday, July 30, 2008

The Never-ending Cake of Doom


We are actually in the middle of moving right now so forgive me if this post is a bit scattered. I made the cake pretty early in the month so I could pack up all my baking stuff. It’s way too hot here to bake!

So, I planned on stretching this over 2 days, but it was actually more like 3 days. I’ll be honest, I don’t like finicky multi-step cake recipes so this was a real challenge for me. I’ve never made buttercream before, or ganache, or cut my cake into layers. I thought it was all just too fussy.

For my flavours, I went with hazelnut gateau, but added coconut to my praline paste (I’ll explain!) and used a watered-down maple syrup for my sugar syrup. Instead of apricot, I did a pear glaze. I ended up with not one, but TWO layers of ganache, one dark chocolate and one milk chocolate (more on that later).

Ok. First thing I made was the hazelnut praline. After roasting the beautiful hazelnuts and rubbing *most* of their skins off into the melted sugar they went. After it cooled I ran into my first glitch:


The praline almost destroyed my blender. It was a sticky, sugar-cement mess. I tried to unclog it by adding some coconut milk to loosen it up, which worked ok but I still ended up wasting a lot of the paste because it actually burnt to the blades the motor was getting so hot. Next tiem I will probably substitute this step with a blend of hazelnut butter (the real stuff, NOT Nutella!) and maple syrup.


The genoise went really well. I used ½ cup ground hazelnuts that I already had in my fridge and substituted arrowroot for cornstarch. This part of the recipe was a bit confusing for me and I ended up clanging around with far too many different bowls, but I figured it out anyway. I made half a recipe and split the batter between two 6” springform pans. I was very happy with how it baked and how fluffy it was!


Then onto the swiss buttercream disaster. Looking back, something may have gone awry at the whisking over simmering water stage, but I’m not sure. At the time I thought it looked OK. It may also have been that my butter was too soft. After a 3-4 rounds of beating/chilling I gave up. I kept thinking “this stupid stuff is just filling anyway, who cares if it’s lumpy?!” But my perfectionism got the better of me and after reading through the DB forum and seeing how hard everyone was working to get this stuff right I vowed to fix my buttercream. But at this point I was totally exhausted and decided to take that project on the next day.


Day 2 I reheated my buttercream and whisked until I thought my arm was going to fall off. Then I chilled it and whisked some more. And it worked!!!! I was thrilled. Time to get this bad boy cake assembled. I used the toothpick method for slicing the genoise. I really didn’t think that the cake needed the whipped cream layers, but I did it anyway. I put some vanilla in the whipped cream for extra pizzazz since I omitted all the liquors in the recipe.


I used Green&Blacks dark chocolate for the ganache, and everything seemed fine until the very end when it started to separate. I think it was too much stirring. I admit I was anxious the get this cake finished. It wasn’t very thick either. I should have let it cool a bit more, but never having worked with ganache before I didn’t really know the consistency I was aiming for. It turned into a sticky drippy mess. Instead of throwing the cake out the window in frustration, I took a deep breath and put it back in the fridge overnight.

Day 3 I made a ¼ recipe of the ganache, this time with Green&Blacks milk chocolate. Yum! This one worked much better, although it was still a bit runny when I poured it over top of the defective ganache. The final cake was very yummy. I froze ½ to have with my parents while they are helping with the move.

My First Challenge – Filbert Gateau with Praline Buttercream

Filbert Gateau2-RobinV

I had a lot of fun making the Filbert Gateau and have a LOT of respect for all of the Daring Bakers who meet the challenge each month! Since this is my first challenge, I decided to stick to the recipe and not make any major “artistic” changes. I also was determined to make each and every part myself (no pre-ground nut flours for me ). I used dark rum in the sugar syrup and Amaretto liqueur in the Praline Buttercream, the Swiss Buttercream, the Whipped Cream and the Ganache. I used ½ orange marmalade and ½ apricot preserves for the Glaze. I appreciated the detailed instructions and each part came out very well. I got so excited once I had the ganache made that I forgot to put on a final layer of buttercream and whipped cream on top of the apricot glazed top layer of cake.

The dark chocolate glaze was so beautiful! I have never been a big cake decorator and had only two tips to go with my pastry bag – I gave it a shot but my buttercream decorations just are not the best. Again, kudos to those who have learned how to decorate well!

Filbert Gateau-RobinV

Now to the taste – I wish I could say I loved it – but the flavors and texture of the cake just did not float my boat. It was very good, but I’m pretty sure I’ll never make it again. I know I will make the ganache and swiss buttercream again. It just didn’t have a lot of ooommmppphhh – pretty subtle flavors. I was expecting more flavor from the praline butter cream! I like that it was not overly sweet as a whole. I loved the texture combo of the praline buttercream and whipped cream layers.

I can’t wait to work on August’s challenge!

- Robin

My Review of the Filbert Gateau with Praline Buttercream

I was nervous about this challenge and actually put it off as long as I could! I've made cakes in the past with this many steps, as I did actually go to school for baking & pastry arts, but it's been a few years and they were always done in a nice, big, professional-style kitchen...not a 1-bedroom apartment-style kitchen with a husband and cat :) Finally, I got home last night, realized I already had most of the ingredients and set out to complete the entire challenge, start to finish, before midnight...and I'm proud to say, mission accomplished! Each step was easier than I imagined, but that's not to say there weren't some questionable moments.

laura

I decided to bake my cake in two 9" round pans and torte each one, for a 4-layer cake...however, the cakes baked sooo quickly, which I think lead to them being a little overbaked and really difficult to remove from the pans. Thus, I wound up with approximately 3 layers in the end...I say "approximately" because I haven't sliced it yet and have no idea what that will result in.

Otherwise, I followed the recipe fairly closely, using almonds and raspberry preserves, in place of hazelnuts and apricot. I also left out the alcohol flavorings this time around.

Also, because my layered cake looked so lumpy, due to trying to repair cracked layers, I coated the cake in the raspberry glaze, refrigerated for about 15 minutes, coated again with a thin layer of the praline buttercream and then refrigerated for another 20 minutes before glazing with the ganache.

A silly prep mistake I made was simply toasting the almonds for the cake and then realizing I needed to toast more almonds for the praline paste - the could've saved me some time.

With the praline, I was so worried about burning my sugar, that I used a pan that may have actually been too thick because it took so long for the sugar to melt - then, I turned away for 2 seconds and had a really dark caramel, which I luckily retrieved just in time - the praline came out really good and the paste was really easy to prepare. This cake has reminded me that making caramel is much less scary than I always make it out to be in my mind.

I do wish I had taken more time to be creative with my decorating, but as I mentioned, I waited until the last minute to complete the challenge and knew I wouldn't have much time after yesterday to complete it, so it was best done the same day.

My finished cake photo is attached - I haven't gotten a slice photo yet because I plan on bringing it into work tomorrow for our July birthday breakfast - mmmm, cake at 10:30 AM - but I will hopefully get another pic before it's gone.

I think that's it. I hope it's not too long...I tend to be quite wordy :)

I look forward to August's challenge!

Laura - LuckyCupcake

Thursday, July 24, 2008

Is it greedy to eat the WHOLE braid?!?!

O.K., I didn't eat the whole thing but I must admit, I was tempted to. This is a great recipe that I hope to make again.

I had my laptop nearby to the YouTube video on making Danish pastry. I wanted to make sure that I did the butter block was done correctly. I was very happy with the results (even if it wasn't a perfect square):

I followed the recipe almost exactly and used the Apple Filling but I added a cream cheese layer along with it. Since I didn't want to mess up on the actual braiding part, I totally did a knock off of Button's danish braid because it looked so pretty (thanks, Button!).

I'm very happy with how it turned out. I did have some butter leakage as I was rolling my dough out pretty vigorously and some apple spillage during baking but no harm done (thank goodness for Silpat). This was one of the tastiest things I've ever made and I'm very proud of myself. Thanks, Daring Bakers!


Wednesday, July 2, 2008

Danish Braid


I'll was pretty excited about partaking in this challenge. The only experience I have with yeast is using a bread maker - and I usually still manage to screw it up somehow.

I really enjoyed making the dough with my KitchenAid mixer - although I'm not sure the mixer was quite capable of handling the dough. It was shaking the entire table! I didn't have any problems rolling the dough. On day 2, when I was going to roll out my braid and fill and bake it - I ran into some issues. I was not able to roll the dough out to the 15 x 18 size, so I did a smaller roll. I chose to make the almond strawberry filling that was used by another one of the DB's. I still had 2 cups of almond meal in my kitchen from the opera cake, so I thought why not? I was originally going to fill with creamcheese and chocolate chips - but I will save that for another time.


I let the bread proof for two hours - but I'm not sure it rised as it should have. After baking the braid, it did not look as flaky as I would've liked. I would like to try this again sometime to see if I have better luck with the yeast rising.

Monday, June 30, 2008

My First Challenge - Danish Pastry

I am happy to report that my first Daring Baker challenge was a success! I have wanted to try a laminated dough for a long time so I was thrilled with this month’s recipe. Inspired by the wild blueberries that grow in my area, I switched the orange zest & juice to lemon and made an oozy blueberry-rosemary jam for the filling. I made two braids. The first one I filled with blueberries and ricotta, the second with blueberries and mascarpone.


Despite the urging of the recipe, I did *not* mix the yeast with cold milk. I warmed the milk to about 80 degrees and let the yeast and milk sit for a while before proceeding. I read that some people were having trouble getting their dough to rise and suspected that the lack of rise could be because the yeast wasn’t activated in the first part of the recipe.

The dough was actually a bit dry in the mixing. I ended up adding a bit of water during the kneading to keep it soft. My little kitchen helper stood by the whole time lending his ‘support.’


I made the blueberry jam with some cane sugar, a squeeze of lemon juice and a sprig of rosemary. I mixed vanilla in with the soft cheese in both the recipes.


The rolling out went okay. I had a tiny butter leak on one side, but it resolved itself after a turn or two. Do not be fooled by the perfect rectangle in the photo! I ended up trimming my dough to fit onto my tiny baking sheet.


A Note About the Small Oven: Being an apartment renter and a baker, I got so fed up with crappy unreliable ovens I got myself a fancy mini convection oven for Christmas. So worth it! It does bake things very fast though. Both my braids ended up being a shade or two darker than I would have preferred.


Aesthetics aside, the results were fantastic! I couldn’t really decide if I preferred the ricotta or the mascarpone; the latter was deliciously creamy but the ricotta was nice as well. I probably should have drained it though so it was fluffier. I made the second braid the next day and I found that the dough was much easier to work with after being in the fridge overnight. Not wanting to waste even the littlest scraps, I made teeny tiny little croissants.


Looking forward to the next challenge! :)

Sunday, June 29, 2008

Daring Bakers June 2008- Danish Braid

After taking last month off to adjust to life in new house with a new puppy, I was excited to get back into the swing of things. Once again, this recipe was a perfect example of why I joined this group. Just as I am starting to get comfortable working with yeast in traditional bread recipes, here comes another curve ball!

I was able to find vanilla beans and cardamom at a local farm store for reasonable prices and had all of the other ingredients on hand. I made the dough and the filling one day and assembled and baked it the next.

I was really intrigued by some of the techniques in this recipe. I did end up having to add extra flour to my dough because it was quite sticky. I was worried about the butter squeezing out during the rolling, but it all stayed put. The apple filling looked delicious and I can imagine making it in the future for a variety of uses. Although the process was time consuming, both the dough and the filling all came together very well. At the end of the day had a lovely dough and container of apple filling resting in the ‘fridge, awaiting phase 2 tomorrow!

My weakness with this challenge was definitely the rolling. Each time I was rolling I wish I had a ruler or tape measure, but still never remembered to get one before it was time to roll again. Also, when it was time to assemble to braid I was a little confused with the amount of dough and filling to use, but went ahead and divided the dough and the filling into two braids. Well, it was a good thing I had two shots at it because the first one was not very pretty. I now realize I did not roll the dough thin enough, which made my braid short and wide. The next one together correctly and looked a lot better.

I let the braids rest for over two hours in the oven with the light on. During this time they did not rise that much. I know it wasn’t 90 degrees as suggested in the recipe, but it was at least 80. Anyway, I decided not to wait any longer and went ahead to bake. The definitely grew a lot during the baking and came out looking golden brown and delicious!

DSCF4283

I decided to make this for my father’s birthday (he agreed to forgo the traditional cake in support of my baking habit) and serve it with vanilla bean ice cream. It was quite a hit! I am so excited to know how to make puff pastry on my own and to be able to create such a beautiful and tasty treat! Thanks again for the fun and the challenge!

DSCF4284

- Sarah T

A pastry by any other name is still a pastry…

And therefore, MMMMMMMMMM… good. This month's challenge was obviously inspired. I happen to be on vacation in the United States and I was excited to be using kitchen utensils that I haven't had for the last 2 years. What better way to make use of them then to make a Danish Braid. I was getting all my ingredients together and for the life of me couldn't find any cardamom at any grocery store in the vicinity. I looked at every store in the city. Kinda of odd that I can find cardamom in Korea but not here. Anyway…. I had to kinda fudge that part of the recipe and just added a little spice to the dough. (to be honest can't really remember what I added….but there were some brown speckles in the dough) I will say making dough with a mixer is a whole lot easier than by hand. Those of you who did use hands I say BRAVO!!!

photo 1

My biggest issue was rolling out the dough the first time after it had been chilling.

photo 2

Now I'm gonna be honest…that is not my hand, and I feel I owe it to my reading public to be completely honest.
This is my hand

photo 3

I had to call in a guest roller outer. One thing I learned in this challenge is that sometimes physical size makes a difference. I'm about 5'4 on a good day. My mom is about 5'10 ¼ on a bad day. I begged her to come in and roll it out for me…(she rolls like no other) and she said she's so good at it because she has leverage. Well that is absolutely true!! (that's my story and I'm sticking to it!) Once I had added the butter and it had been "fold & rolled" a couple times I was better able to roll it out. At first it didn't start out so rectangular, but by the end it was perfectly rectangular. I just forgot to take a picture of it. Oops.

photo 4

I split the dough in half and on one day used the instructed apple filling. It was fantastic in texture and taste.

photo 5

The dough was not what I had expected it to be and I had wanted to make a savory filling, but then I changed my mind and made another sweet filling. Apricots are in season and I knew they needed to be in the braid. I made a cream cheese filling with cream cheese, a little sugar & vanilla, a little egg beaters and a pinch of flour. I then sliced the apricots in half so that you could see them through the braid. It was fantastic. So fantastic they ate it before I got back to photograph it. Argh!!!! I loved this recipe and am anxious to make smaller sized pastries to take to get-togethers. Thanks to Kelly and Ben for picking out such a great recipe…and thanks to all Daring Bakers for making me look like I know what I'm doing in the kitchen.

photo 6

- Amber

Not Even an Altercation Can Stop a Daring Baker! :)

This is my first Daring Bakers Challenge and I was very excited when I saw this month's recipe. I love cooking but I'm new to the baking thing so this was a great challenge - I mean there was YEAST involved! We throw a lot of parties in my house - small impromptu parties and "Oh my god there are way too many people in my house" planned (sort of) parties. People always ask what they can bring and I recently decided that I no longer wanted my response to be "Well you can bring dessert because I don't bake". So for Christmas my boyfriends family showered me with gifts that would help me conquer my baking fears, including a KitchenAid mixer (WAY too generous but so AWESOME!) and Martha Stewart's Baking Handbook, probably knowing that my baking experiments would surely benefit them.

I must admit though that this month has been packed with weddings and work parties and family visits and as June 29th got closer and closer I was thinking "Maybe I'll skip this month's challenge" more and more! But, luckily, my Danish loving boyfriend would not allow that. I started my Danish Wednesday night and as I was about to run around the corner to get whole milk people started fighting in front of my house! They were yelling things that sounded completely ridiculous coming out of fat white men's mouths like "Yo I'm a gansta for real" and "That was a jab! I knocked you out with a jab!" so that delayed things for a minute. It's still funny to me that people are getting in fist fights outside my door while my boyfriend and I listen to NPR and bake Danish! So anyway I eventually got my milk and made the dough. I was concerned about butter leakage but luckily it was minimal. I did put the butter in the fridge after I made it because I still had about twenty minutes to wait for my dough and I worried it would get too soft. Things were looking good. I made an apple blackberry filling with apples, blackberries, sugar, cinnamon and lemon juice and a sweet cream cheese filling with softened cream cheese, lemon juice and honey. I finished my final folds and put it in the fridge to rest.

Thursday after work I rolled out the dough and added my filling, cream cheese on the bottom, apples on top. Next time around I'll add more, I think I was too worried about over stuffing. The braid didn't look so good but I didn't have time to worry about it – I had a party to get ready for! So I gave my boyfriend the instructions for egg washing and baking the Danish and left it in his hands. He did a great job as you can see from the photos. Although he did confess that he forgot to turn the oven temp down and ended up just baking the whole thing for twenty minutes on 400 but it still looks and tastes delicious. I can't wait to play with the other half of
the dough that's sitting in the freezer!

daring baker-SaraF

Thanks Daring Bakers for an awesome challenge!

- Sara F

Respect, or, Walk A Mile In My Clogs

We’ve all seen them before. On the lounge area table of the discount motel chain. Huddled in miserable groups next to giant, cottony muffins, an urn of burnt coffee and pitchers of watery orange juice serving as sentinels. You probably bypass them in favor of a puffy, doughy bagel. Occasionally, someone will be foolhardy enough to select one, but can only muster a handful of bites before consigning it to the trash. They are often prepackaged in cellophane, like members of a suicide cult. Their fillings are congealed white globs of “cheese” or, even worse, dark brown smears of “prunes.” It’s as if they had been created by someone who had no sense of taste or smell, and, in fact, they served as punishment for those that do. Indeed, why would anyone willingly subject themselves to such abasement?

I speak, of course, of the Danish.

Prior to this month’s challenge, my experience with Danish consisted of the exact scenario above: repulsive, overly sweet and artificially-flavored discuses of pastry found primarily in the hushed and awkward breakfast areas of motels. I readily admit my preference for sweet things for breakfast, but even these Danish defied my palate. In short, they were awful. Yet, Danish come from a long and storied baking past, so surely in their original incarnations they must have actually tasted like, you know, food.

The announcement of the challenge, Danish Braid, actually thrilled me. Laminated dough! Yeast! Braiding! This is why I signed on to be a Daring Baker, to expand my baking repertoire, become a better person. Surely I would develop a new respect for these much-maligned pastries if I had to make them myself.

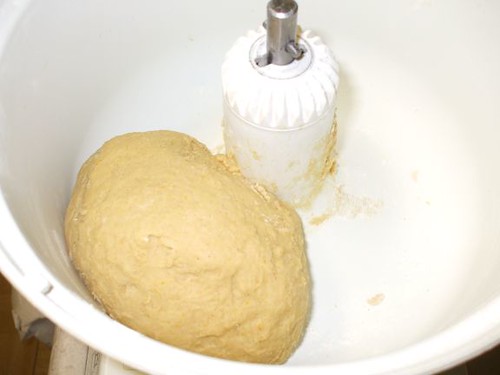
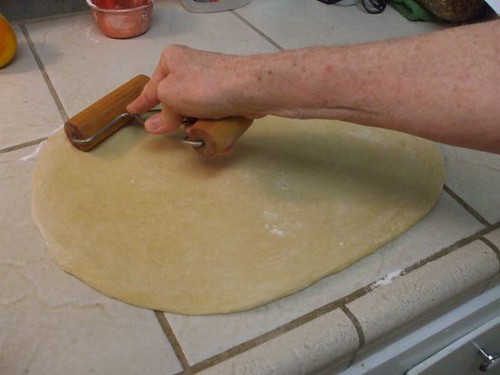
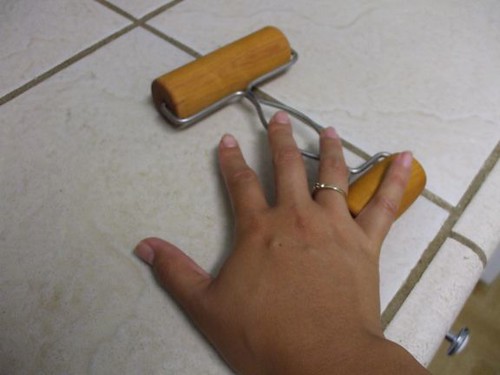
The process proved to be a good deal more manageable than I had anticipated. By dividing the actual mixing and shaping of the dough into two days, I was able to tackle each step without feeling overwhelmed. Detrempe (dough)—check. Beurrage (butter block)—check. Turns (rolling and folding the dough to create layers)—check. I’d always wanted to try making puff pastry, and this was a good introduction to the process. Perhaps I might attempt croissants de boulanger soon. (Or maybe that should wait until the mercury drops below a drillion degrees, and my apartment without air conditioning.)

Just a little bit-AmyS

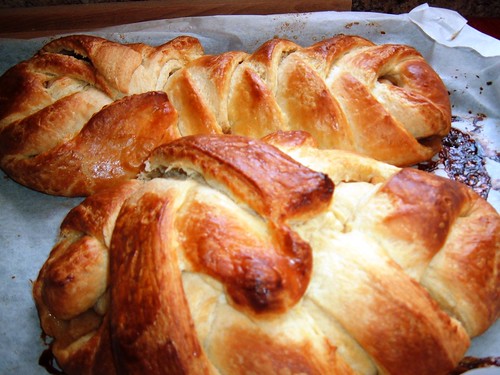
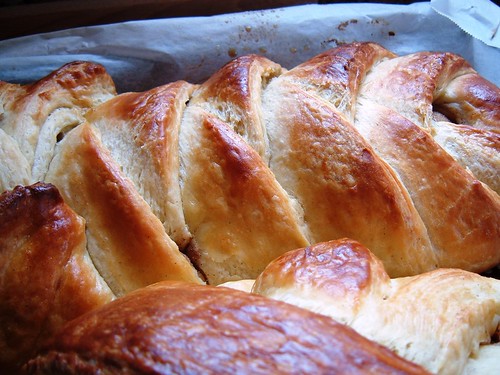
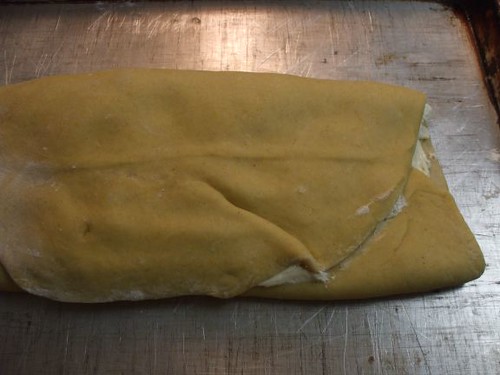
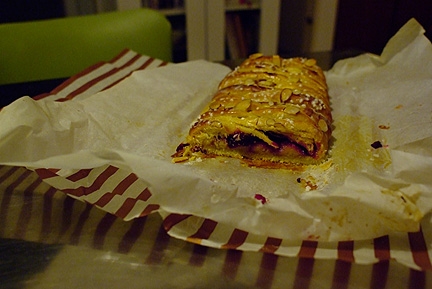
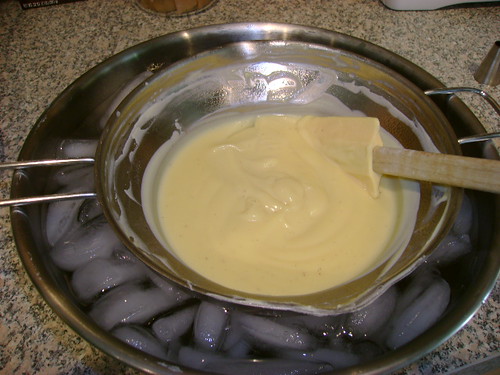
To fill the Danish, I took fresh cherries and made an extremely easy but appallingly tasty jam, following a recipe from Baking With Julia, and also made a frangipane (almond filling) from the same book. Smeared on the frangipane, topped it with the cherry filling, and then it was time to braid. Braiding is the social currency of little girls. What would sleepovers and summer camp be without the constant braiding and unbraiding of each other’s hair? Like grooming chimps, girls seal social networks through French braids and fancy, princess-like hair arrangements. Throughout elementary school, junior high and high school, I had short, pixielike locks, which meant that, in addition to being mistaken for a boy, my own braiding capabilities were sadly compromised. Or maybe I’m blaming my hair for me being unpopular. Anyway, when it came time for me to do my Danish Braid, there was a small glitch. I miscalculated the measurements and had a slightly different number of dough strips on one side of the pastry than the other. Ah, well, it’ll sort itself out in the oven.

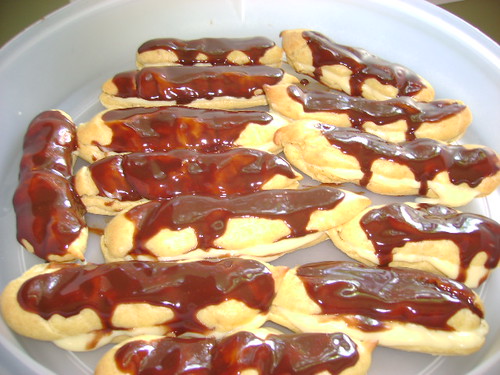
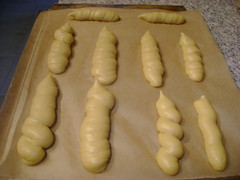
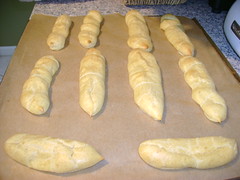
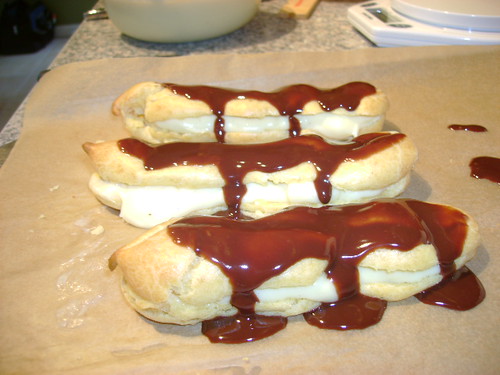
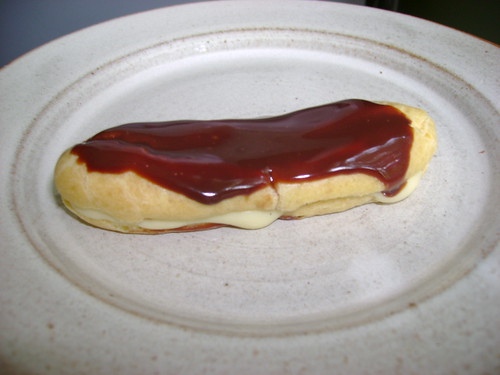
There was extra dough left over, so I experimented with making small Danish, using strawberry jam, frangipane and mini chocolate chips in sundry combinations for the fillings. A rise, an egg wash, a sprinkling of pearl sugar, and into the oven, me pretties!

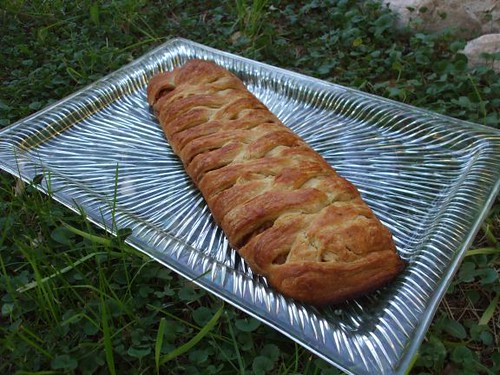
While they baked, the apartment filled with the evocative scents of cardamom and orange, the traditional Scandinavian flavorings for Danish. And when I pulled them from the oven, they did, indeed look like actual Danish only, you know, edible. Whilst the pastries were hot, I brushed on a simple glaze of powdered sugar, lemon juice and milk. It melted into the dough, creating a lovely sheen.

R-E-S-P-E-C-T-AmyS

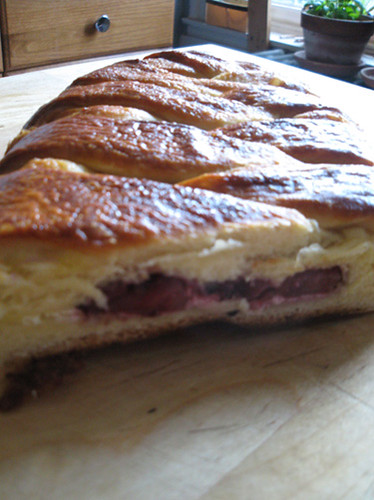
Waiting to taste the Danish was an exercise in self-control, and my gluttony won, so that I cut and ate my first piece before it was cool. And lo, a revelation. I wondered why anyone would label the motel monstrosities “Danish,” when the difference between those and what I had produced was as sizable as me slapping on shoulder pads and calling myself a defensive lineman for the Cincinnati Bengals. (I am, dear reader, a mere five feet tall, and flinch when a Nerf football is tossed gently in my direction.) Z. took the remainder of the Danish into work the following day, and many declared it the best Danish they had ever eaten, or so I am told. It did not last long on the craft services table. The piece I had set aside for my mother-in-law was eaten by yours truly. (I’m sorry, Pauline!)

(You may be wondering, what happened to the individual Danish? Dear Reader, I accidentally burnt them into hard briquettes. Vanity prevented me from having them photographed.)

So, thanks to the Daring Bakers, I learned a new lesson in respect. Mock not the true Danish. It is a noble beast that deserves a far greater tribute than being relegated to the rubbish bin of the Motel 6.

I remain,
Yours, &c.
Ami

Danish braids...yum

Well, I find recipes fall into 3 categories. Bad, Good, and Really Super Duper Good. This recipe was so super duper good, i made it twice. Lets go back to the beginning.

Any of you who actually know me, know that I'm in culinary school right now for Classic Pastry Arts. We started a venoissierie section just before this challenge and I was literally thinking when I came on to the DB site to find out what the challenge was, hm..danish would be a GREAT challenge...most people at home don't work with laminated doughs. So I came on and I was like YES!!! (I got just a little excited and did a little happy dance) and then I got to thinking..oh, what oh what can I make as a filling. And the ideas just started pouring out of my head and on to paper. I literally had a page and a half of things i could do! My husband thought I was obsessing just a bit to much. So on to baking day.

The followed the recipe and I love cardamom, it's what we used in the danishes at school. So the first one I did was a bit traditional. Almond creme and raspberry jam and topped it with a strudel topping. And Oh, it was good. The second was the apple compote. I liked it, I wasn't crazy about it though. Then my dear dear hubby told me on a thursday night that he had invited 2 of his co-workers and their wives over for dinner friday night! Ack! I hate when he does that!!!! So I decided to go a bit different. I wasn't quite in the mood for "normal" dinner party food, so I decided to make another danish braid! But this time, I made it with cream cheese and smoked salmon. I put everything bagel seeds on the top and it was soo yummy. I served it with fruit salad, coffee and OJ in lovely wine glasses. And I gave slippers and pjs to all our guests and we had a breakfast party. They thought it was the greatest thing ever. I was a great change from a traditional dinner party. And the last one I made I had some fun with. I made a pecan pie filling, it was so gooey and messy but so good.

So there you go, my four different but very yummy danish braids. I know, I know, still no pictures. I've given up with my darn mac and trying to get it to do new things. I'm off to go read more about danish braids..you should too!!

The Danish that never was

I am sad to report that my danish never happened... and here is why:
I'm in the process of moving cross-country and had to finish my job and a major part of my dissertation before we left. However, I was really excited when I saw what this month's challenge, especially since I've never made a laminated though. So I decided to tackle it as a birthday present to myself.

I decided to make it apricot-lime, inspired by a lovely jam from the Hi-rise bakery. I thought the orange flavor would clash with the apricot-lime, so I substituted lime juice for orange juice... but then I realized that those two are far from substitutable because my lime juice (straight) was VERY acidic. I tried to fix it by adding more sugar to the dough, but alas it didn't work. My dough tasted overpoweringly lime-y and for some reason, made my fingers sting when I played with it (maybe it was the paper-cuts I had from filing last minute paperwork). To make matters worse, my Kitchen-aid mixer went crazy again, as with my cursed party cake. When I turned it on to low (or to anything), it started going faster and faster, beyond the fastest usual speed, and then would turn off. I took it as a sign that I should stop and go work or pack!

Another reason I'm sad my Danish never happened is that, between the move and some traveling we'll be doing, I will miss the July and August challenges too! I'll try my best to make it for August but I think it's unlikely... In any case, I hope everyone had fun in this challenge and the next ones and I will see you in September!

Monday, June 2, 2008

L’Opéra Party!!

I mistakenly poured all the cream into the ganache. So I had to scoop some of the ganache into the white chocolate when I made the glaze.
But that part worked out OK. I used lemon juice instead of water in the syrup and that was delicious. To go with the lemon, I used spiced rum and vanilla so the cake had a tropical drink flavor.

My friend Genie had called to say her family was away for the day and would I join her at church then come to her house to grill burgers? I told her about the challenge and we decided I should bake it at her house. I ground the almonds at home and pre-measured all the ingredients and took everything with me. I worked on it all afternoon.
We had so much fun that she invited friends, her family came home unexpectedly, and we turned it into a party.

It is morel mushroom season in northern Michigan so we had burgers with grilled morels and onions and white cheddar melted on top, chunky redskin potato salad, baked beans with pimentos and spicy red peppers, a huge bowl of baby greens, some good wine, and lots of happy conversation.

Opera Cake Final Submission

The cake got a little rushed at the end and I was chilling things in the freezer so it would be ready in time. I did not get the lovely, smooth, even look some of you got, the ganache was undulating and the glaze only partially smoothed out the top. We took it out into the afternoon sunshine on the deck and picked some springtime dandelions and pink begonias to decorate. After a photo session, we discovered the piece we had cut to photograph was entirely too big to eat. Wow!
Was that thing sweet and rich!

Even so, most of us had a second piece. I left a huge section for my friend's teenage son who fell in love with it. More went home with her friends, and the rest came home with me. I sliced and put 2-packs in the freezer -- it freezes and serves really well. I gifted two of my neighbors and the manager of our complex with more pieces.

It was rich and sweet and completely over-the-top and I doubt I will put this much work into a cake again. But the experience was worth it.
We had a lovely afternoon and I was able to get better accquainted with some new neighbors while sharing a really special cake.

What an adventure! And this was my first challenge. I hope it doesn't get any more hectic than this. I don't think I could stand the excitement.

PS: Genie's friends decided we were going to have another party so they could help me eat next month's challenge.

PSS: My friend Genie cut really thin slivers and covered them with strawberries and even those who thought the cake was too sweet loved it. Even her husband who dislikes any desserts except fruity ones.

- Betty