Friday, February 29, 2008

French Bread! In My Own Kitchen!

Ever since we got back from our honeymoon in Paris 6 years ago, my husband and I have been lamenting the fact that there is no great bread in Central Massachusetts. In Paris we just about lived on bread, and any mention of a good baguette makes us want to hop on a plane. Of course, a 4 and a 2-year old complicate that a bit. So, I couldn’t have been more thrilled to see this month’s challenge was French bread, Julia Child’s recipe, no less. And I was not disappointed.

IMG_3647

The recipe was really long. Really, really long! But I read through it several times before getting started, and I am pleased to say everything went smoothly. I mixed and kneaded my dough by hand, resisting the temptation to add more flour when it seemed a little sticky. That is my biggest mistake whenever I make bread, so this time I just scraped the counter, kept on going, and in the end the dough was beautiful. Into the slightly warmed oven it went for the first rise, which ended up taking about 4 hours. I was really confused about the directions for making the dough into a “cushion shape” for the second rise, not sure if I was anywhere close, but it didn’t seem to matter. Second rise took a little less than 2 hours.

IMG_3651

On to shaping. This was the hardest part, since I apparently missed the fact that there is a video out there showing how to do it. I made 3 batards, and the first one was not the prettiest! But the 2nd and 3rd looked good, and I managed to not tear the “coagulated gluten cloak.” (Who knew bread-making had such technical words!) In for the last rise on my floured dishcloth.

IMG_3654 IMG_3661

Flipping them over onto the baking sheet was hard, at least for the first 2, the last one was easy since it was now alone on the cloth. I slashed with my sharpest knife, no problems there. Baking went smoothly, and I even remembered to do the spraying thing the correct number of times. They did come out a little darker than I was expecting. I brushed the tops with water after they came out of the oven for shine, although I didn’t really notice that making any difference.

IMG_3662

And now the waiting. My 4-year-old daughter came into the kitchen to say “I smell something yummy, like bread.” My husband wanted to know if we had to wait until they cooled, or if it was just a suggestion. Two hours of torture! But so worth it! This bread was good stuff. It even passed the crackly-noise test my husband devised after we watched Ratatouille. After 12 hours of off and on work, it made an excellent dinner with some cheese and fruit. We felt like we were back in Paris again (the fact that we ate dinner at 8:30 pm helped with that feeling!) Those 3 batards disappeared awfully fast. And now my husband wants to know when I will be making French bread again. Soon probably! I think in the future I will invest in some of those wavy baguette pans, and see if it comes out as good without all the floured cloth and flipping. But this recipe will have a permanent place in my house. Just imagine, you can get great bread here, right in my own kitchen!

- Brooke

A Very Long Engagement


I had a hunch that this month’s challenge would be bread, given the wonderful hostesses (Breadchick Mary & Sarah). I was not, however, prepared for a 14 page recipe for French bread straight from Julia Child! While French bread is my favorite kind of bread (the crispy crust and spongy inside… yum!), I had heard that it was impossible to make in a regular oven. I read the recipe a couple of times and was very intimidated and confused, as I’m not the best at getting an accurate visual from a written description. I also watched the Julia Child PBS video online and felt a bit more at ease. Lastly, I read the wonderful reviews and encouragement from other DBers who had completed the challenge, and decided to get started.

I decided to make the dough by machine, and it was very easy. The initial mixture was pretty sticky but with a bit more flour and the 5 minutes of machine kneading it had a lovely soft and springy texture. Here’s my dough at the end of the initial mixture:

I set the dough to rise inside my oven (light on, oven off) and after 3 ½ hours, it had grown to 3 times its size. I deflated it, with lovely popping sounds, and set it to rise yet again, for another 2 hours! Here it is after deflating and before the second rise:

After the second rise, I was ready to cut and shape, the scariest part for me. Here is where the video was very helpful! I was able to figure out what the crazy descriptions meant, having seen them in action. I decided to make 2 batards and 1 boule. Overall, the shaping went OK, although the loaves were not as smooth and perfect as in the video. Here are the shaped loaves ready to rise (again!):

After another 2 hours, the loaves were ready to slash and bake. Here is where I made a slight procedural mistake. Even though I had started the process at 9am, it had gotten pretty late with the crazy rising times. We had invited some friends over for dinner 7:30pm and I had to use the oven for some of the other dishes (oven roasted veggies and chocolate pots de crème). We decided to begin roasting the veggies while the oven preheated, then bake the bread, then bake the custards (which ended up chilling in the freezer for lack of time), and then the veggies again. So, while the oven (with a pizza stone on the top rack and the veggies in the bottom) preheated, I slashed the loaves (not perfect but good enough) and set them on the pizza peel:

When the oven was nearly preheated, out went the veggies and in went a cookie sheet that we used for generating steam. When the oven and cookie sheet were fully hot, in went the bread (on the pizza stone) and some hot water (on the cookie sheet). This generated some steam but not as much as I hoped for. My brilliant husband suggested that maybe using boiling water would work better, and that worked great. After baking, the boule turned out beautiful and the batards looked ok, a bit gimpy and slanted by nicely browned and crusted. Here are the loaves cooling:

Audience Response:

We ended up serving the boule and some of the batards for dinner (after only 30’ of cooling… my bad) with muhammara (a middle-eastern roasted red pepper) and it was delicious! Everyone agreed that it tasted just like bakery baguettes or even better. My husband thought the bread was even better the next day but I though it was the same as before. Overall a big hit!

What I learned/practiced:
1) I love crusty bread (not new info) and can make it at home! The tricks for making our home oven into a bakery one will definitely make a recurrence the next time we make bread.
2)
Sometimes a recipe may look long and scary and intimidating and just turn out to be long (not scary or intimidating), and be well worth the wait.


The final verdict:

When I finished the bread, I though I would never make it again. One week later, however, I’m already thinking/dreaming about fresh home-baked baguettes. As it turns out, this recipe was not really difficult at all, just very very time consuming. Also, as my husband put it, bread that only has 4 ingredients should not be this much of a production. I may make this again on a lazy day but not for company (too much stress!). I think I’ll likely use the baking tricks when making other (easier) kinds of bread, although I bet I won’t get the same crusty-yet-spongy result. Otherwise, baguettes from the bakery it is!

Thirteen-Hour Bread; or, The Bread Bakes at Midnight

Bread is the foundational food almost everywhere in the world. Volumes have been written about its importance, its significance, its history and its making. Bread comes in an infinite number of varieties and permutations. But at its root, it is three ingredients. Water, flour and yeast. With such simplicity, there is nowhere for the novitiate to hide. Miscalculations and errors are thrown into high relief. No surprise, then, that for many professional bakers, the simple loaf of French bread, pain français, is used as a test to judge their proficiency and skill. People spend their entire lives pursuing the Platonic ideal of French bread.

And then there’s me. I bake cake. Cookies, too. And brownies. And make candy. Bread, though, was still largely unknown, even with the previous month’s challenge of potato bread. Again, Z. is the bread-baker in our household, I the dessert maker, and we were both content with this division.

When the DB challenge for February was revealed, I wasn’t disappointed, but I knew the optimum world would be challenge. The recipe, from Julia Child’s seminal work on French cooking, is a thirteen-pages treatise. I approached the process with the peculiar combination of curiosity, trepidation and excitement. It was time to bake with the big boys.

Sticky

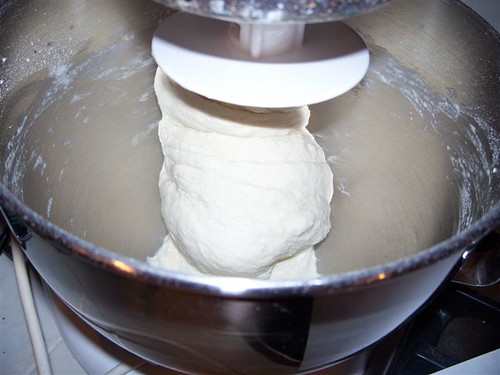
Our hosts for the challenge, Mary and Sara, were gracious enough to include many asides and notes throughout the recipe, so I was able to know ahead of time that my little Kitchen Aid Artisan’s 325 watt mixer would be no match for the dough. I was able to immerse myself fully in the mixing and kneading process. Some bakers and cooks love to just get right into their food and mix it with our most primal tool, the hand. I’m not one of those bakers. I find it, well, icky. But in this case, it was an interesting experience to feel the dough change from a heap of flour and water and yeast into an actual dough that was glutinous and alive. The dough, I will note, was extremely wet and rather sticky, but I didn’t want to adulterate it with too much flour and wind up with a tough towel instead of tender bread, so I refrained. After kneading, I placed it into a plastic tub with a lid, which enabled me to see its progress during the rise. It took a while, but once I unsnapped the tub’s lid to let in a little air, the dough rose much faster. This first stage took five hours to get a good rise.

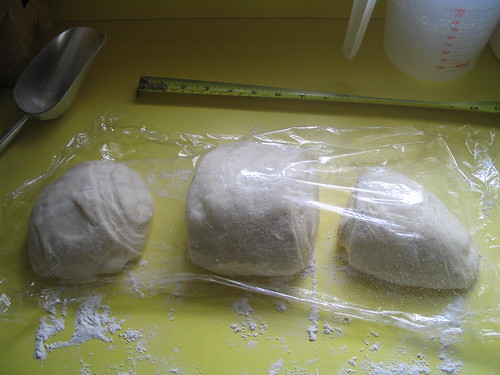
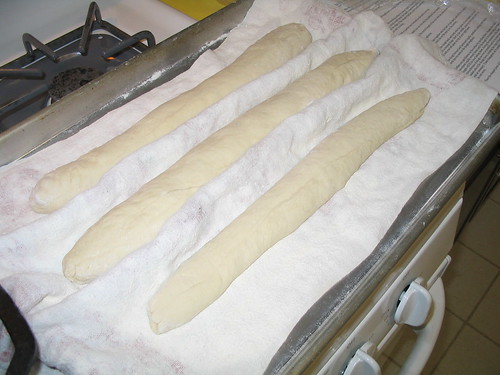
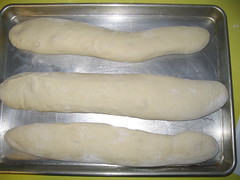
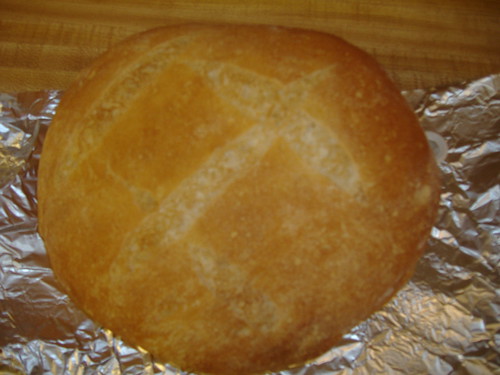
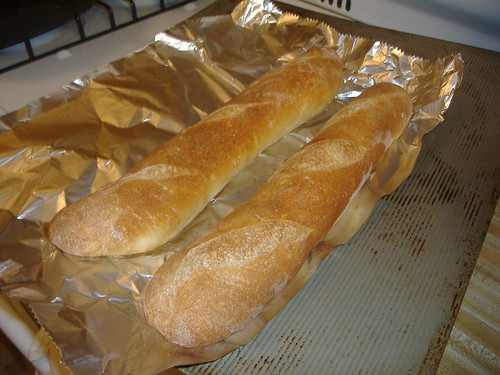
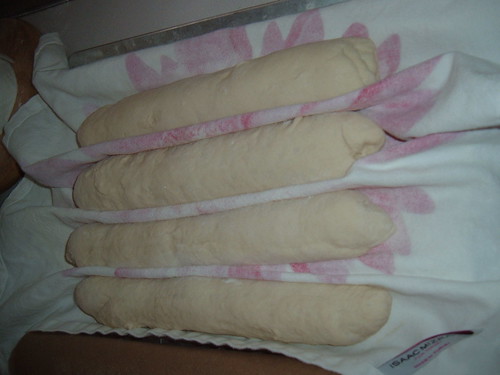
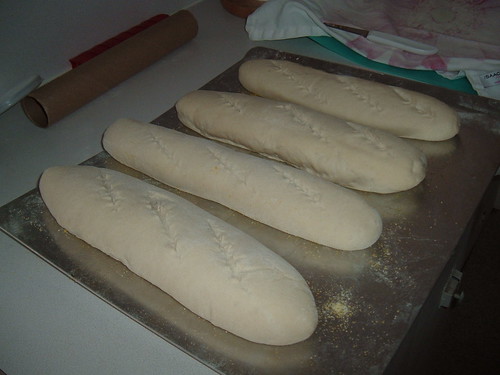
Many more steps, involving deflation, rising, shaping, and yet more rising. None of the steps were particularly difficult, but the amount of time that each required used an entire day. No doubt, a professional bread baker would shudder at my technique, especially when it came to shaping. I wound up with some rather oddly-shaped batards, a few resembling boomerangs and not loaves of bread. Knowing that this was my first attempt at French bread, the benchmark of baking ability, I didn’t concern myself overmuch with the external appearance of the bread. As many a mother has counseled her teenage daughter, it’s what’s inside that counts. Fortunately, my bread wasn’t waiting by the phone, hoping that the cute brioche from calculus would ask it to the dance.

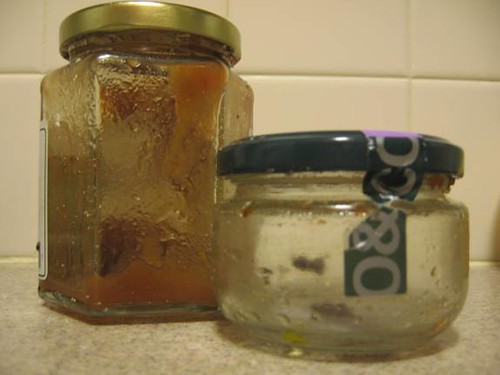
I began the baking process at eleven in the morning. By the time I was sliding the bread into the oven, it was ten at night. Meanwhile, Z. had spent the day also cooking a number of French food, inspired by my bread. Crepes for breakfast (delicious, we had them with various combinations of Nutella, bananas and blackberry jam), then, for dinner, coq au vin, a gratin of potatoes and leeks, and, for dessert, chocolate mousse. (Yes, I am aware that I’m extremely lucky to have him for my husband.) Ironic, then, that my inspirational bread wasn’t even ready to eat to accompany this French feast, even though we ate dinner at the cosmopolitan hour of nine thirty in the evening.

Waiting

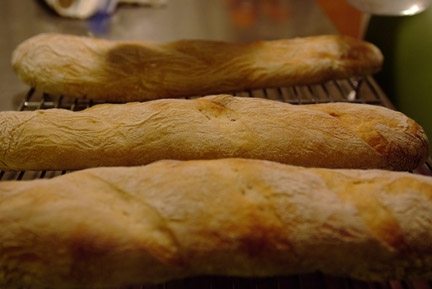
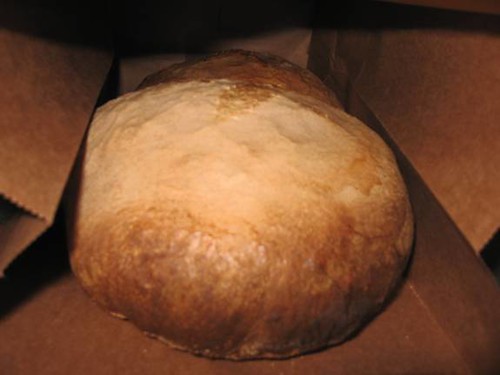
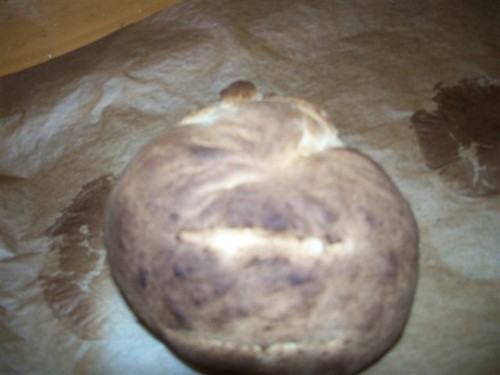
We have a pizza stone, so I baked the bread directly on this, and put a pan of ice cubes in at the same time to attempt to recreate the critical steam oven. I forgot, in my haste, to brush the bread with water before baking, but it was late at night and I was ready to just bake the damned bread already. When it came out, it definitely looked like bread, and smelled like it, but the recipe and our hosts stated explicitly that it had to cool for two to three hours. So, we ate dinner. We had dessert. We watched bizarre VH1 “celebutainment.” We played with the cats. And finally, at midnight, we tried some bread.

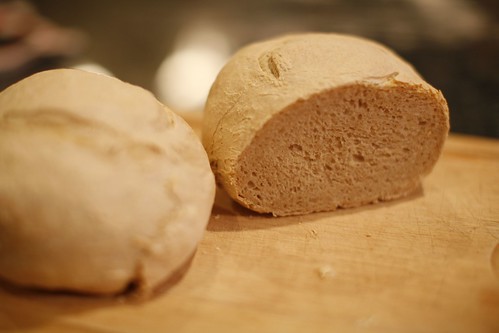
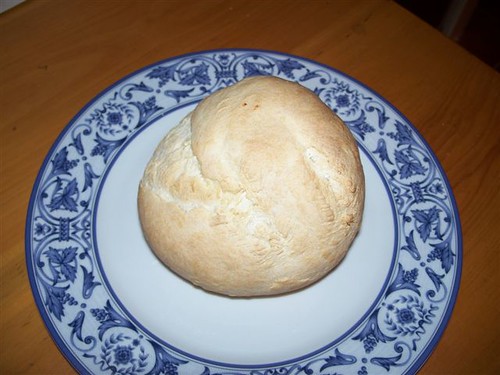
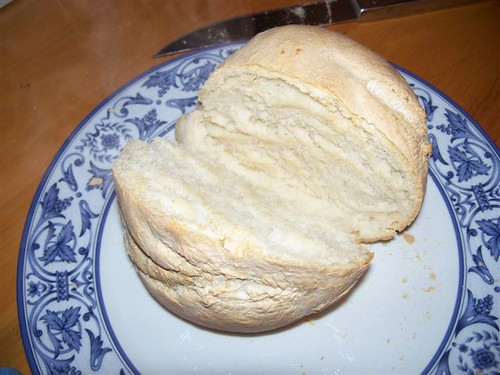
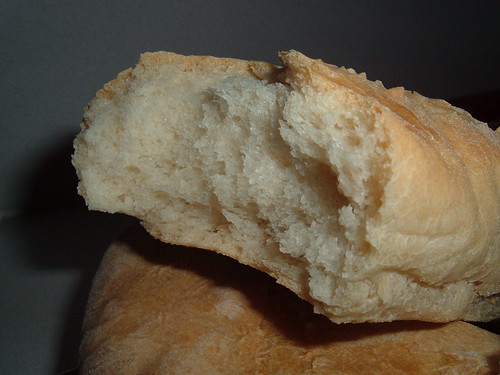
The crumb was gorgeous, the flavor pronounced but not yeasty and raw. The epic rises leant the bread a tangy, almost sourdough quality. Ah, maturity! Z. confessed to being jealous of the flavor, having not yet produced it in his own bread baking, but I demurred, citing the more than nine hours of rising time as the key to the bread’s success and not some particular skill of my own. The bread in question was put into the bread bin and we retired for the night, both of us exhausted. He’d been cooking all day and had done the dishes at least five times.

SIiced

Breakfast was toasted bread with jam on some pieces, Nutella on some others. We took it to Z.’s mom’s place for lunch, and there weren’t enough leftovers after all that to make a bread pudding, as I had been anticipating. When my mother-in-law tried the bread, she exclaimed, “This is real.” And, indeed it was. Real bread. That I had made. Myself. The food which supported the planet, which shaped nations and defined art. I’d done it. I reveled in my small accomplishment, pleased that I had, in fact, made French bread. It wasn’t pretty, but it was true. And, while I enjoyed the process of its creation, I will never attempt this recipe again. I cede the bread ovens of this globe to stouter souls than mine, who hold in their flour-covered hands the sustenance of the world.

Your servant,

Ami

9 hours, 4 ingredients, 1 great bread!

I've been intimidated by yeast for a long time and I had resigned myself to never having homemade bread. Well, when I started baking yeast breads this fall in my baking classes I was amazed at how easy it actually was. I had such fun making white pan bread, sourdough buns, raisin bread, rye bread, breadsticks etc. Over Christmas I also made the most delicious asiago cheese bread using a recipe created by our very own Breadchick, Mary, co-host of this month's Daring Baker challenge.

So when I saw this month's challenge was French bread, I thought noooo problem. Even after I saw the seventeen page printed recipe, I thought how hard can it be? I mean just because it takes 17 pages to instruct you how to put together four ingredients in a 7-9 hour timeframe to make a loaf of bread, that doesn't mean it's difficult, does it?!? So off I went in my blissfully ignorant state of mind to make the most perfect French bread ever. Let's just say that my first attempt ended up hanging off both ends of the pizza stone and was a misshapen mess!!!
I got up at 7am on a Saturday morning and hummed to music as my trusty KitchenAid mixed the ingredients together. I used instant yeast since I had it on hand and have been happy with its consistent results in the past. The dough kneaded in the mixer for around 7 minutes and required a little more flour than called for in the recipe. I finished the kneading process with a minute or two of hand kneading and the dough felt wonderfully elastic. I placed the dough ball back in the cleaned KitchenAid mixing bowl, covered it and put it into the oven for the first rise. I was thrilled with Mary and Sara's tip to put the oven light on to get the oven to the right temperature for the fermentation process.

Three hours later the dough had tripled in bulk and was ready for a punch down and second rising. It felt wonderfully warm and smelled fantastic. Then back into the oven for its second rise. My first inkling of problems to come started during the shaping stage. I had decided to make 2 batards and divided the dough accordingly. I felt reasonably comfortable shaping the dough after watching the recommended PBS episode of Baking with Julia (It was great to find out that you could watch these old episodes online - what a treat!) I unfortunately used a floured cotton tea towel to place the shaped bread on since I didn't have linen. I also put the loaves on the towel seam side down, opposite of what I should have done. This meant that I had to really manhandle the dough onto the board and then try to get it off the board onto the pizza stone in the oven. Good luck!!! That darn dough wouldn't budge. I finally rolled it off by hand and it fell upside down on the stone, with both ends dripping off. Urgghhh!!!

After 10 minutes of naively thinking "it can still work out", I decided to cut my losses and try again with the second loaf. This time I used a baking sheet lined with parchment and then manhandled the second loaf onto it. The result was much better (there was no place to go but up!) especially since I had ice cubes at the bottom of the oven for steam and misted the loaf 3 times with water. The loaf was a little misshapen due to manhandling and using a knife for slashes rather than a razor blade but it still was presentable. But the fight in me came out and I decided I would tackle the recipe again the following weekend, armed with the knowledge gained from this experience. (And as a sidenote, when I returned from my dinner party a few hours later, I put the first loaf back in the oven, baked it for the remaining 10 minutes and ate it the next day. Surprisingly, it tasted great - better than anything you can get at the supermarket. It just looked like a big, drippy breadstick!!!!)

Second time was a charm and I baked a French bread that not only tasted great but looked good. It had the distinctive flavour, crispy crust and large holes throughout that you want to see with a French bread. Thanks to Jason for wonderful pictures again this month and to Mary and Sara for hosting. It wasn't the gooey, chocolatey February dessert that I was expecting but it was a recipe that both challenged and delighted. Just what you want from a DB challenge!

Thursday, February 28, 2008

A Chilly Breeze Does Not Help Bread Rise!

Well, this month's challenge was a big flop for me. Usually bread bakes beautifully in my kitchen, but not today.

First of all, this morning I started my bread just fine. I left to run a few errands as it had 3 hours to rise. Well, I'm in Arizona where the weather was a perfect 81 degrees F, but quite a bit chillier in the house with the slight breeze once my husband thoughtfully opened all the windows. Needless to say, my bread didn't rise. At that point there was no warm area in my house, so I put my bread in my warming
drawer on the proof setting. It did rise a bit, but nowhere near the 3 1/2 times it was expected to. I continued on, hoping for the best. The second rise did do much better, so again I continued on to make medium sized boules. Once I shaped them and allowed them to rise for the 2 1/2 hours needed. And once again, they didn't rise. I was completely dumbfounded. They only rose during the second rising period, so I knew I hadn't killed the yeast. Well, I stuck to it, and turned the boules onto my baking sheet. Although I was very gentle they collapsed. I've never let my bread rise upside down before, so this was a new way for me. I scored it, baked it, cooled it, and finally cut into my boule.

Tina E

Although I sprayed it with water the bread didn't turn a nice golden color. Instead it stayed a pale white. The bread itself was very dense and smelt very yeasty, almost as if it had been sitting in my bread box green for over a week. Yowser, it was strong! With the aroma we (my husband and I) weren't to keen on trying it, so I just photographed it instead.

Tina E

Besides the cool air of my house I have no idea what I could have done differently. I'm going to start again tomorrow, hopefully with better success. A great challenge though- always learning and moving on.

- Tina E

Julia Child’s (Julia Child’s!) French Bread

This months Daring Bakers challenge was hosted by Breadchick Mary of The Sour Dough and Sara of I Like to Cook. My reaction to the challenge, Julia Child’s French bread, was emotionally complex. It went like this…..


  1. Overwhelming excitement. I was secretly hoping it would be a savory challenge. I was also secretly hoping it would be bread. I didn’t even dare to secretly hope for a Julia Child challenge. I adore Julia Child. Adore.
  2. Sheer terror. As I’m typing this right now, I’m still trying to figure out the best way to include the fairly daunting (at first glance) recipe with my write-up. Length + very precise conditions + lots of ‘the dough should’s = terror.
  3. Moderate excitement. Bring on the daunting recipe! It’s a little scary, but how satisfying is it to buckle down, focus, and tackle something challenging? It’s gotta be at least moderately satisfying. And I do have all of the ingredients. And Julia Child.
  4. Moderate terror. After 4 or 5 read throughs, the recipe didn’t seem so bad. The shaping and the dough handling and the temperature monitoring were still a little intimidating, but how much can one screw up when most of the time, the dough is just sitting there rising? It’s gotta be not very much.
  5. All of the above. On game day (a gray snowy day in New England), I was both braced and eager.

The dough came together quite nicely, without any additional flour or water. Most of my fears subsided after the first rise. The directions that seemed a little abstract and ambiguous on paper started to make perfect sense. The second rise went equally well. The shaping (I made two round loaves) was…..ok. I’m fairly convinced that my technique was flawed, but they were round in shape and they got bigger, so I was satisfied.

Getting them into the oven and onto the pizza stone was a little clumsy, and the oven temperature was a little precarious. I did try to recreate a baker’s oven, by spraying a hot baking sheet with water, but I don’t know that it was very effective.

Picture time! Before the bake, I was so concentrated on getting each step right that I completely forgot to take pictures. Here are my two loaves, packed up and ready to go.

Ami B- pic1_bread

One had a date with some tapenade, and the other, a date with a pretty hunky apple butter. We got so carried away eating the bread, that again….I forgot to take pictures. However, this last one should provide some indication of how the bread turned out. :)

Ami B- pic2_jars

- Amy B

French Bread by Julia Child

Niharika (1)

I had a good time preparing the bread. It was a challenge as I rarely follow the recipe exactly as stated. I even read the recipes at least three times and had the book open on a chair as I shaped the dough. I let the dough rise at far more cooler temperatures as I had to fit it around my day. I had to look up information about the canvas and purchased a 1/2 yd. piece of duck cloth from Jo Ann.
I would consider this a difficult bread for a new bread baker.

Niharika

-Niharika Shah
(Nutty Baker)

Bowling with Julia??

Monica

I started using a new and different yeast touted as being a "liquid" yeast found here in Italy - probably meaning it was mixed with water ahead of time but it was found in the refrigerated section meaning the yeast was probably made "lazy" by the cold.

Monica (1)

I added slightly more flour than called for due to the fact it was a humid and rainy day here in Tuscany. However, after the two rises I really was sure this bread was not "it" and I was right.

Monica (4)

The bread turned out a bit like a bowling ball (I chose to make 2 boules out of the batter which I slashed before putting in the oven).
I was a bit surprised at the fact that they did not rise enough or create a good "crumb" - most likely due to the yeast I foolishly chose to use.

Monica (5)

The first boule I took out of the oven was not cooked enough, the crumb was too moist, so I let the other one go a long while which was too dark for my kids' taste bt actually I liked the somewhat darker crispy crust.

Monica (6)

The comment that I heard repeatedly though was the fact that it lacked salt - I used the required amount - maybe we are salt-a-holics around here but it could have used more salt.... anyway, I can tell my bread flopped and I am sorry about that as I am sure Julia would be disappointed in me! :-(

M.

February 2008 Daring Bakers Challenge- Julia Child’s French Bread

Well, here we go with my first challenge as a Daring Baker! I was very excited to join this group and was thankful to be able to participate even without having a blog of my own. I have loved baking since I was a child and am excited about this opportunity to bake outside of my comfort zone.

I should point out that this will be my first, and only, challenge in my tiny, uneven, drafty apartment kitchen. My husband and I should be moving into our new house within a month, so hopefully I will be baking up the next challenge in my new kitchen! Until then, we shall do the best we can with what we have!

Sarah T (5)

When I heard about this month’s challenge I was excited and a little nervous. I only began baking with yeast about 6 months ago. My previous, all bet it limited, experience and my upcoming week-long vacation gave me the ambition to take on this challenge!

I was lucky enough to be able to set aside a full day to complete the challenge. I had read, re-read and highlighted the lengthy recipe in preparation. At 9am I began! My dough came together pretty well. I ended up having to add extra flour, probably around a cup, because the dough was so sticky. My Kitchen Aid Artisan mixer did a pretty good job, but I did end up kneading by hand at the end. With steps one and two complete I set up dough up in the oven with the light on for the first rise.

I checked on the dough after 2 ½ hours and was very surprised to see that it had more than tripled in size already! I do not have a thermometer in my oven, so maybe it was warmer than 70 degrees in there? Anyway, I moved on to step four and prepared the dough for the next rise. It was a little sticky again so I sprinkled some more flour, but it worked into the cushion shape quite nicely. Back in the oven and again we wait!

Sarah T

During the second rise I watched the video on the PBS website to get some pointers on shaping the dough, as this is the part of the process that caused me the most apprehension. The video was very helpful! So, off I went forming my loaves. I decided to make four batards. As I was forming the loaves according to the video and the directions in the recipe, I thought with amazement “this is going much better than I imagined!” It was then that I looked up and caught a glimpse of my kosher salt….salt that I haven’t used all day…salt that was supposed to go in to the bread in the first step of the recipe! Yes, that’s right, I forgot the salt. Drat! I am surprised this mistake didn’t impact the rising or anything else….Anyway, we have come this far, we might as well see it though to the end. I knew it didn’t seem right for things to go so smoothly! I formed my four loaves and waited for the final rise.

Sarah T (1)

I had a little trouble with slashing the loaves because I didn’t have a razor blade and I later realized they weren’t as long or deep as they should have been (I think the lack o’ salt realization shook my confidence and focus!) Anyway, into the oven they went!

Sarah T (2)

25 minutes later, here they are! I was pleased to see that they browned nicely. I planned on taking a loaf to my brother-in-law’s for dinner, so hopefully they taste okay. And now, more waiting as they cool.

Sarah T (3)

Two more hours later (8 hours after I began) it was time for the moment of truth. The verdict is in and the bread tastes…okay! Obviously the lack of salt left it lacking in flavor, but it is nice and crusty on the outside and soft inside.

Sarah T (4)

All in all, I would say it the French Bread was a success! Thanks for a great challenge! I look forward to next month!

-Sarah

Tuesday, February 5, 2008

Mmmmm....donuts!

When the call went out for a baking event from two of the Daring Bakers whose blog I read on an almost daily basis, Helene and Peabody, I had to yes. It didn't hurt that the challenge was to bake donuts. Mmmmm, donuts... You almost can't be a Canadian without loving donuts. With a Tim Hortons around every corner and colleagues who bring donuts and, of course, Timbits (donut holes for non-Canadians!) as a matter of course to meetings, you can't escape the donut. And who would want to!?!

I have never made donuts before so I welcomed the opportunity. But what to make? My involvement in the Daring Bakers group made the decision easy - it was just one of those weeks where everything connected and came together like I had planned it. I made a christening cake earlier in the week using the mocha buttercream from the December yule log challenge as the filling. Since that recipe just called for egg whites, I had egg yolks in the refrigerator to use up in another recipe. Hunting around for something yummy to make, I came across an old post of Helene's for white chocolate pots de creme. Perfect. That made a quick and easy dessert for Sunday dinner when neighbours came over. Even after everyone had their fill of the custard, I had some leftovers to use up. Now what? Back to Helene's site and the call to make donuts. What better than to use Helene's recipe in a Boston creme filled donut for her blogging event. The circle was complete! From egg yolks from a Daring Baker recipe to Boston creme donuts for an event hosted by two Daring Bakers.

I found a good recipe on the Food Network site. Other than the donuts taking such a short time to fry and coming out darker than I would have liked, the result was what I had wanted. The cream filling was rich and flavourful, the chocolate glaze was silky and not too sweet and the yeast dough had such a light texture. Really, a wonderful donut.

Unfortunately I was unable to get good pictures as I finished the donuts first thing in the morning and my usual photographers had already left for work. To take advantage of the great light outside and white backdrop of the snow, I shovelled a path with my feet on the back deck and propped the plate up on a table that had been left outside to brave the winter cold. I'm sure I could feel the eyes of neighbours peering through their windows wondering what the crazy lady was doing without her jacket on, in 2 feet of snow, taking pictures of donuts! Oh well, I enjoyed seeing the snowflakes melt on the warm donuts.

With pictures done, I packed them all up to take to my moms group. Unfortunately, I hadn't planned on icy road conditions and ended up stranded at home with 20 fresh donuts. I figured I could at least brave the icy sidewalks and made my way around the neighbourhood delivering donuts on a sled to those that were also stuck at home. It not only made their day but saved me from the temptation of eating them all! Thanks Helene and Peabody for a great challenge.